

|
|
|
|
|
|||||||
| Home | Forums | Gallery | Webcams | Blogs | YouTube Channel | Classifieds | Calendar | Register | FAQ | Donate | Members List | Today's Posts | Search |
 |
|
|
Thread Tools | Display Modes |
 02-24-2010, 10:39 AM
|
#1 |
|
Senior Member

Join Date: Apr 2004
Posts: 2,560
Thanks: 149
Thanked 229 Times in 166 Posts
|
I need to fix a Drywall hole about the size of a grapefruit. Someone told me to spray in foam insulation let it expand, dry, then simply sand it and skim coat it with spackle. Has anyone used this method? Does anybody know of another tried and true way?
Remember, I barely know which end of a hammer to hold. 
|

|

|
|
02-24-2010, 11:00 AM
|
#2 | |
|
Senior Member
Join Date: Feb 2009
Posts: 1,139
Thanks: 223
Thanked 319 Times in 181 Posts
|
Quote:
- First square up the hole. - Then cut a piece of drywall the same thickness as the hole, 3" wider and 3" taller than the hole. - Turn over the patch piece and score about 1 1/2" in from the edges with a utility knife. You are not going through but just scoring the paper to the same size as the hole. - Now carefully fold back and peel of the drywall part at the score but leave the FRONT paper intact. You do not want to mess up the front paper but remove the rock part behind it. After you do one it will be easy! - Now you have a piece of sheetrock with the front paper sticking out 1 1/2" all the way around. Test fit into the hole to make sure it fits OK. - Put joint compound on the edges of the hole, also on the face of the wall out at least 2" and about 1/16" to 1/8" thick. Install the patch piece and using a 6" taping knife, squeeze out all excess joint compound. Let it dry for a few hours or until all white. - Do a couple more thin coats around the edges as needed until smooth with the rest of the wall, and your done!! - Lightly sand, prime and paint !! I used Joint compound above for clarity but instead of joint compound I would recommend using Durabond 90, it dries faster and will not shrink in the space, get it at the hardware store and pick up a small painters pail to mix it in, Water and powder, very easy, needs to look like oatmeal without the lumps. It sounds harder but you will never get that patch to look right by spraying foam in the hole and trying to mud over it, it will take a week to dry and will always look sunken in and the first time someone hits that spot with anything it will crumble. |
|
|
|
|
|
02-24-2010, 11:28 AM
|
#3 |
|
Senior Member
Join Date: Apr 2004
Posts: 2,560
Thanks: 149
Thanked 229 Times in 166 Posts
|
Thank you jmen I will try your method but use Durabond 90. I was just concerned the patch would be a soft spot in the wall only basically being held by the "wings" of the paper. But I suppose the secret is to cut the patch pretty close in size so I can also bond the edges of the wall. The wall is paper by the way so that may also be a little more forgiving. My only problem now is the damn wall paper!
|
|
|
|
|
02-24-2010, 11:37 AM
|
#4 |
|
Senior Member
Join Date: Feb 2008
Location: Gilford, NH / Welch Island
Posts: 5,932
Thanks: 2,290
Thanked 4,941 Times in 1,917 Posts
|
Jmen;
I have seen this method of drywall repair done a number of times and always wondered why do they call it a "California Patch"?? Dan |
|
|
|
|
02-24-2010, 12:02 PM
|
#5 |
|
Senior Member
Join Date: Apr 2004
Posts: 2,560
Thanks: 149
Thanked 229 Times in 166 Posts
|
In surfing the web some sites recommend cutting the hole large enough to open up a stud in the wall and screw the patch to it. I feel that would be over-kill I really do not want to open up the hole that large. That is of course where they studs are in relation to the hole. If the stud is very close anyway I suppose it would make sense.
|
|
|
|
| Sponsored Links |
|
|
|
02-24-2010, 12:10 PM
|
#6 |
|
Senior Member

Join Date: Oct 2005
Location: Pine (Alton) Mountain
Posts: 138
Thanks: 39
Thanked 33 Times in 20 Posts
|
The advantage of cutting the hole back to the studs is that you can then put a new piece of sheet rock in on the same plain as the orginal wall. Then after joint compounding (assuming a half way reasonable job) the patch should not be noticable.
I think if the Calif method is used you will always be able to see a raised portion of the wall where the patch over lays the original wall. If that's not a concern then by all means go the Calif way. |
|
|
|
|
02-24-2010, 12:43 PM
|
#7 | |
|
Junior Member
Join Date: Feb 2010
Location: Columbia, SC
Posts: 7
Thanks: 0
Thanked 3 Times in 2 Posts
|
Quote:
Cut a rectangular piece large enough to cover the hole Mark around the hole using the rectangle as a guide Cut using the mark. You now have a hole that matches the rectangle Cut 2 pieces of 1x4 long enough to overlap the hole by 2 inches on each end Fasten each piece of wood behind the drywall so part of it extends into the hole Fasten the patch piece onto the wood Tape and mud the joints. Sand Paint I did a few searches and found a page that shows some pics: http://www.mygreathome.com/fix-it_gu...hing_holes.htm |
|
|
|
|
|
02-24-2010, 12:45 PM
|
#8 |
|
Senior Member
Join Date: Apr 2004
Location: Wayne, PA & Mirror Lake
Posts: 150
Thanks: 116
Thanked 17 Times in 15 Posts
|
I have seen the "California patch" method done in ceilings where old high hat light holes were patched. I don't know if I would do it in a wall where it might get bumped (I just don't know the strength). If you do use this method as recommended by jmen24, it should be noted that Durabond 90 is a setting type joint compound and hardens by chemical reaction and not by drying like your typical joint compound sold in buckets (I think quart size the smallest). The older/original Durabond 90 really can't be sanded and hardens like a rock. If you are a novice and use the original formulation, it may be trouble since you can't sand smooth. Also, the Durabond joint compounds are sold in powder form and you will be stuck with quite a bit.
If I had to do it in my home, I would first square up the hole. I would then cut strips of 1/2 inch thick plywood (since I have plenty around) probably about 2-1/2 inches wide and put pieces of this around the backside perimeter of the hole (half of the width exposed, the other half behind the drywall; hold in place and fasten with 1-1/4 inch drywall screws). Now cut a piece of drywall the size of your squared up hole, fit into hole and fasten to the already secured plywood pieces. I would use plywood since it won't split and I always have some around. Now finish like any typical drywall seam. I have used the sanding type Durabond 45 for a first coat if I'm in a rush to apply the second coat. The numbers are either the working time in minutes or the hardening time in minutes. This may be overkill for such a small hole but it works. If the hole is small, you could make the plywood cover the whole hole and extend maybe 2 inches on two ends. Hope the above is clear enough. Again, just my two cents again. Last edited by Mirror Lake's BB; 02-24-2010 at 12:55 PM. Reason: Just an overkill comment |
|
|
|
|
02-24-2010, 01:05 PM
|
#9 |
|
Senior Member
Join Date: Feb 2009
Posts: 1,139
Thanks: 223
Thanked 319 Times in 181 Posts
|
Dpg
The options for using the wood behind the hole are good as well, I would not open the hole to the studs, you still have to tape those joints which will build you past the face of the existing wall, those would be butt joints and I have seen pros than cannot get a butt joint to look right. If you are going to go with either of these two methods, you need to create a v-channel at your joints, fill with durabond and then tape coat over that, otherwise you will have to feather out your tape joint in order to blend it. Do not just mud the seam without taping it, it will crack the first time something hits it. You never said anything about wall paper, that makes things far more interesting, best bet is to attempt to remove the panel of paper that the hole is in, hopefully you can find a replacement. The other option would be to remove the pieces of paper of the broken sheetrock and try and glue the puzzle back together, either way alot of work. Other than I think a nice wainscotting would look nice in that room. Not a real wallpaper expert, maybe someone will have something for you.The new formulations of durabond are all sandable, durabond against joint compound will always sand harder, its a harder finished product. The 45, 90 and 120 represents time to fully cure. They are all the same product just formulated to dry at different rates, 45 or 90 is typically used for tape coat or repair work (no sagging and keeps tape nice and clean) and I have not seen anyone use 120 for anything. Dan, I have no idea why they call it a "california patch", maybe its all those flipped homes out there that have alot of holes in the walls and flippers are looking to go as cheap as possible, who knows. 
|
|
|
|
|
02-24-2010, 01:19 PM
|
#10 |
|
Senior Member

Join Date: Jul 2002
Location: Central MA
Posts: 2,352
Thanks: 18
Thanked 535 Times in 179 Posts
|
I like the aluminum patches you can buy inexpensively at Home Depot, Loews, etc.
The newer ones are sticky backed. Just stick over the hole overlapping by a few inches and apply joint compound. Sand and apply more joint compound to smooth the edges into the wall. These are good for smaller holes such as grapefruit sized. 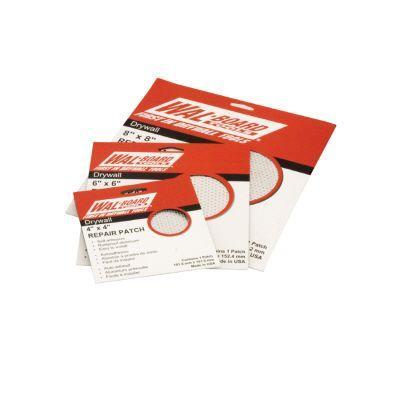 http://www.homedepot.com/webapp/wcs/...egoryID=502707
__________________
Island Girl ....... Make Lemonade |
|
|
|
|
02-24-2010, 01:25 PM
|
#11 |
|
Senior Member
Join Date: Apr 2004
Location: Wayne, PA & Mirror Lake
Posts: 150
Thanks: 116
Thanked 17 Times in 15 Posts
|
jmen24,
Didn't know the old Durabond was no longer available. I bought mine way back when at a building supply store specializing in drywall. Back then, I never even knew Home Depot or Lowes even existed. We only had Channel and Rickels in our area. |
|
|
|
|
02-24-2010, 03:49 PM
|
#12 |
|
Senior Member
Join Date: Apr 2004
Posts: 2,560
Thanks: 149
Thanked 229 Times in 166 Posts
|
Thanks all you have been very helpful. Last night when I was looking at it I seriously didn't have a clue where to even start. I will visit a HD or Lowes and also get their opinion then go from there. I'm wondering if the "instant" screening method would work good enough? The hole is probably the size of an orange. The backing strips sound like a good solid fix also. Worst case I'll take a little piece of wallpaper from a corner of the room behing the dresser for now. I want to do a good job with the paper, it's definitely where you'll see it in the room. No matter what I do it sounds like there will be a little bump there and I'm sure not perfectly smooth.....We'll see.....Honestly I was just going to contact a handy man but I think I'll try.
|
|
|
|
|
02-24-2010, 04:26 PM
|
#13 |
|
Senior Member
Join Date: Mar 2008
Location: Welch Island and West Alton
Posts: 3,218
Thanks: 1,174
Thanked 2,002 Times in 915 Posts
|
Both Lowe's and Home Depot have home do-it-yourself books. My old Home Depot "Home Improvement 1-2-3" (480 pages) book covers most of the methods that have been mentioned here with illustrations and step by step instructions. Plus just about any other home repair task.
This is a good type of book to have as there will be other problems in the future according to Murphy. |
|
|
|
|
02-24-2010, 07:56 PM
|
#14 |
|
Senior Member
Join Date: Jun 2008
Location: Portsmouth. RI
Posts: 2,231
Thanks: 400
Thanked 460 Times in 308 Posts
|
Wallpaper ..is a WHOLE Different ballgame. Patching the wall board is one thing... but I don't see anyway to fix the wallpaper without re-wallpapering the Entire wall...after the wall board is fixed.
BTW: Nothing is as complicated as the experts will make it out to be.  No offence intended toward well meaning experts. NB No offence intended toward well meaning experts. NB
|
|
|
|
|
02-24-2010, 08:42 PM
|
#15 | |
|
Senior Member

Join Date: Nov 2002
Location: The Lakes, Central NH. and Dallas/Fort Worth TX.
Posts: 3,694
Blog Entries: 3
Thanks: 3,069
Thanked 472 Times in 236 Posts
|
Quote:
And could fix you up in a jiffy! He's got this O'L civil War cannon that he would tow over, shoot some more matching holes in you're wall and stick a sign up out front saying, "Next To Custer's Last Stand Was Fought Here!" Step right up and get you're tickets, $100.00 bucks a pop! Just make sure that you sign a contract, and read the fine print, so as you don't end up with any more of his junk, in case things should go south!! ___________________________ Love, T
__________________
trfour Always Remember, The Best Safety Device In The Boat, or on a PWC Snowmobile etc., Is YOU! Safe sledding tips and much more; http://www.snowmobile.org/snowmobiling-safety.html |
|
|
|
|
|
02-25-2010, 07:29 AM
|
#16 |
|
Senior Member
Join Date: Apr 2004
Posts: 2,560
Thanks: 149
Thanked 229 Times in 166 Posts
|
Not re-papering the entire room right now. That will be done in time I'm sure.
") For now I want to cut out a decent matching patch from a blind corner of the room. For now I want to cut out a decent matching patch from a blind corner of the room. Will be re-papering a few bedrooms soon anyways. My daughters room still has pink flowers in it and she's a senior in high school. Needless to say she hates it. 
|
|
|
|
|
02-25-2010, 09:36 AM
|
#17 |
|
Senior Member

Join Date: Apr 2004
Posts: 5,075
Thanks: 215
Thanked 903 Times in 509 Posts
|
Which ever method you choose to repair it,(I would put would bigger than the hole behind it and secure with drywall screws)to get a perfect fit remove a piece of wallpaper bigger than the patch.Make sure you harvest from a part of the paper that matches your repair area.Place the repair piece over the patch matching the existing pattern.Hold in place with tape and then cut through both wallpapers with a straight edge.You will have a perfect match.
__________________
SIKSUKR |
|
|
|
|
02-25-2010, 12:15 PM
|
#18 |
|
Senior Member

Join Date: Jan 2005
Location: Nashua,Meredith
Posts: 951
Thanks: 213
Thanked 106 Times in 81 Posts
|
I have a couple of rental properties and you can only imagine the repairs. I simply go to HD or Lowes and you can buy a small square of drywall cut it to size,put a hole in the center for a nail to hold it in place,skim coat of joint compound then woven sheet rock tape another very very light coat to fully bury the tape. Wait to harden sand a maybe one more coat,very strong and with sanding and painting invisible. Oh by the way after setting in place with first coat just push the nail into the cavity and finish process.
|
|
|
|
|
02-25-2010, 05:06 PM
|
#19 |
|
Senior Member

Join Date: May 2007
Posts: 248
Thanks: 6
Thanked 5 Times in 5 Posts
|
Many good ideas have been posted so thought I would throw mine in also.
The way we do it in the business of repairing may not be the way everyone else does it, but we have found it to be easy and strong. We either cut a piece as close as possible to the hole or we will cut it the hole into a square and cutting a piece that size. We next attach a piece of 1 by (X) approx 3" larger than the replacement piece (sheetrock screws). Then insert the piece into the hole (put screw in the center to hold it in place) and attach the piece of 1 X on the ends to secure the piece into the hole and then just proceed as one would apply sheetrock mud until they reach final finish.
|
|
|
|
|
02-25-2010, 05:08 PM
|
#20 |
|
Senior Member

Join Date: Apr 2004
Location: formerly Winter Harbor, still Wolfeboro
Posts: 1,135
Thanks: 284
Thanked 480 Times in 271 Posts
|
Hang a picture over the hole.
|
|
|
|
|
02-25-2010, 08:34 PM
|
#21 | |
|
Senior Member
Join Date: May 2007
Posts: 248
Thanks: 6
Thanked 5 Times in 5 Posts
|
Quote:
|
|
|
|
|
|
02-28-2010, 08:47 PM
|
#22 |
|
Senior Member
Join Date: Apr 2004
Posts: 2,560
Thanks: 149
Thanked 229 Times in 166 Posts
|
Started the repair today. I went to Home Depot and bought a small piece of sheetrock, putty, putty knife, tape and a pkg of special "hooks" to screw the new piece in place. I squared the wall hole and made a template out of cardboard, it's now screwed in place and I filled in the slight gap all around with putty. I'm now waiting for it to dry then will tape it and skim the whole area. It looks great and the new section is sturdy as a bugger! Not sure what their called but they sell little tab things that you use to screw into the wall and you screw the patch piece into it. Total cost today $20.00 I'll do the best I can matching the paper but I'm not real concerned with that as much as I was mending the wall correctly. Within a few years I'll be repapering all three bedrooms anyways. Thanks again.
|
|
|
|
|
03-01-2010, 11:19 AM
|
#23 |
|
Senior Member
Join Date: Apr 2004
Posts: 5,075
Thanks: 215
Thanked 903 Times in 509 Posts
|
Total cost to repair a hole that size should be about $2 with scrap. As long as its done the repair is "priceless".
__________________
SIKSUKR Last edited by SIKSUKR; 03-01-2010 at 01:41 PM. |
|
|
|
|
03-01-2010, 12:03 PM
|
#24 | |
|
Senior Member
Join Date: Apr 2004
Posts: 2,560
Thanks: 149
Thanked 229 Times in 166 Posts
|
Quote:
|
|
|
|
|
| The Following User Says Thank You to dpg For This Useful Post: | ||
SIKSUKR (03-01-2010) | ||
|
03-17-2010, 11:14 AM
|
#25 |
|
Senior Member
Join Date: Apr 2004
Posts: 2,560
Thanks: 149
Thanked 229 Times in 166 Posts
|
Finished and it came out awesome!

|
|
|
|
|
| Bookmarks |
|
|


 Linear Mode

